
I have used GNS3 for my network certifications study for many years. It is an open-source network emulator that can be used for various types of testing.
One of my recent favorite use cases is using a bridge connection. With it, I can test my physical devices and connect them to virtual devices in GNS3 for my lab environment. This is especially useful for 802.1X related testing.
Setting up a lab RADIUS server itself is usually not difficult, but building multiple servers requires some resources and time. However, this is something I often need to do for my work.
GNS3 provides an AAA image, which is the best tool for this type of testing. It allows me to quickly and easily set up multiple servers, build and scrap them as needed. I can also take advantage of other features, especially packet capture with Wireshark on the desired interface in GNS3, which is extremely helpful.
To run this lab, I use an Intel NUC running ESXi. On top of that, GNS3 is installed, and I connect to it from my MacBook using the GNS3 application.

Here are the steps to run two RADIUS servers for an 802.1X wireless connection test, including failover and fallback features, although more servers can be added if needed.
1. Setting up Radius servers
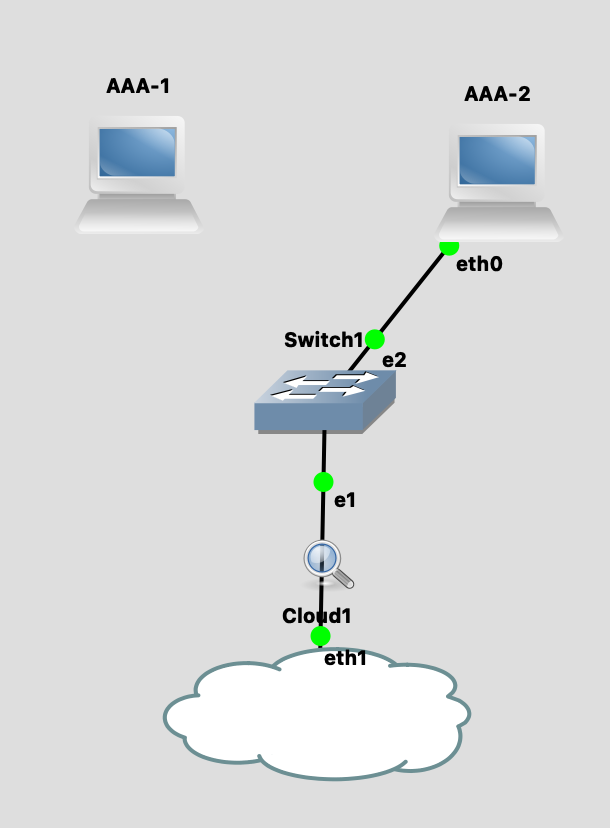
Once I open the app on my MacBook, I add two AAA servers and connect them to a virtual switch. Add a bridge connection, which is the Cloud node in GNS3. My NUC has only one physical interface, I added two USB NICs and use the second one for this test with the bridge connection.
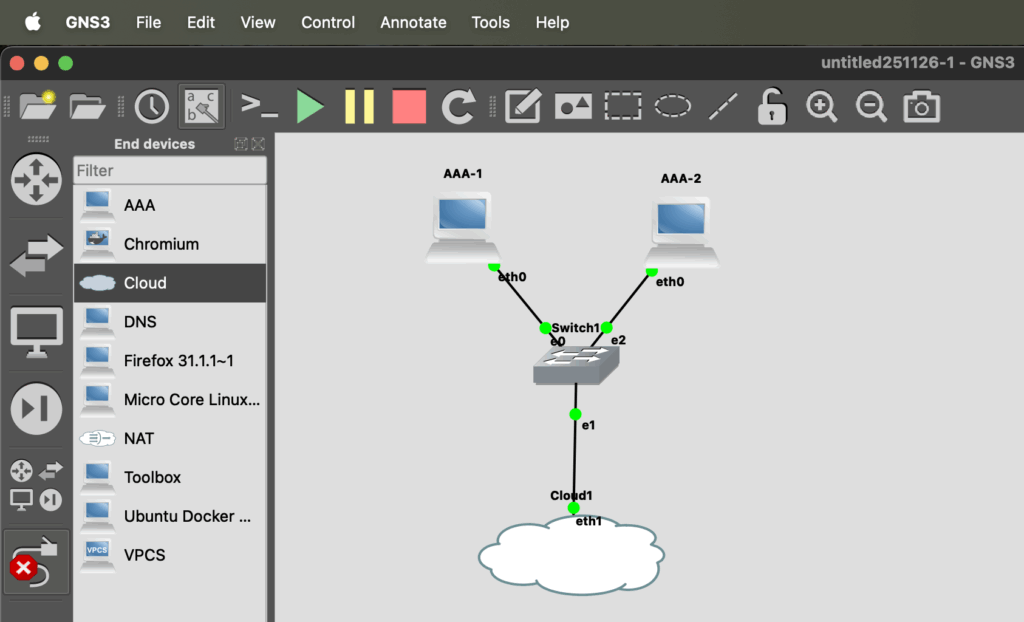

After that, configure the servers to obtain an IP address via DHCP. They should receive an address from the 192.168.128.0/23 segment in my home lab. No VLAN tag is used this time to simplify the test.
Here is a simple topology include both virtual and physical devices.

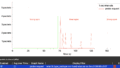
I also started Wireshark in GNS3, which will be helpful for later testing. Since the capture is taken at the virtual switch uplink, it should include all traffic to and from both servers.
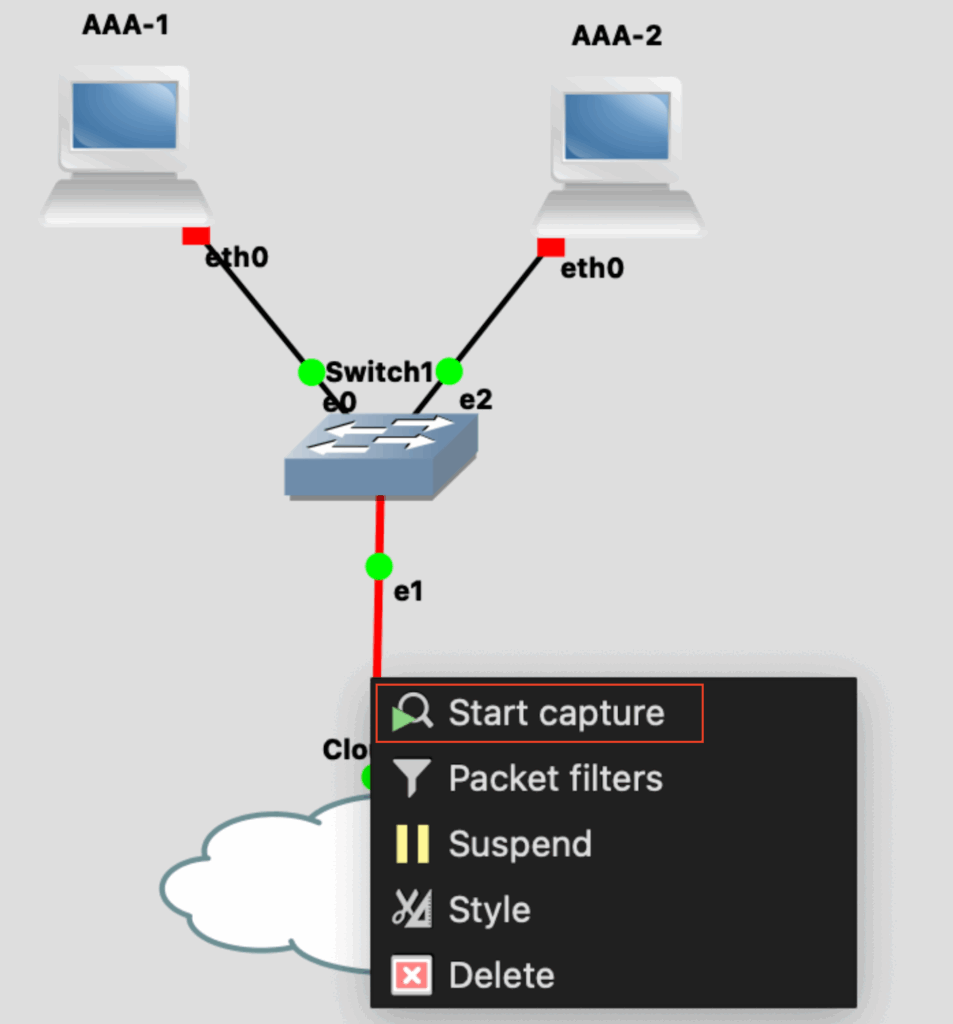
After starting the two servers, we can see bi-directional DHCP traffic between the virtual RADIUS servers and the upstream physical DHCP servers, exchanged through the bridge connection.

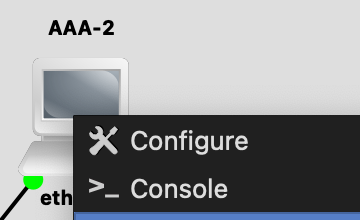
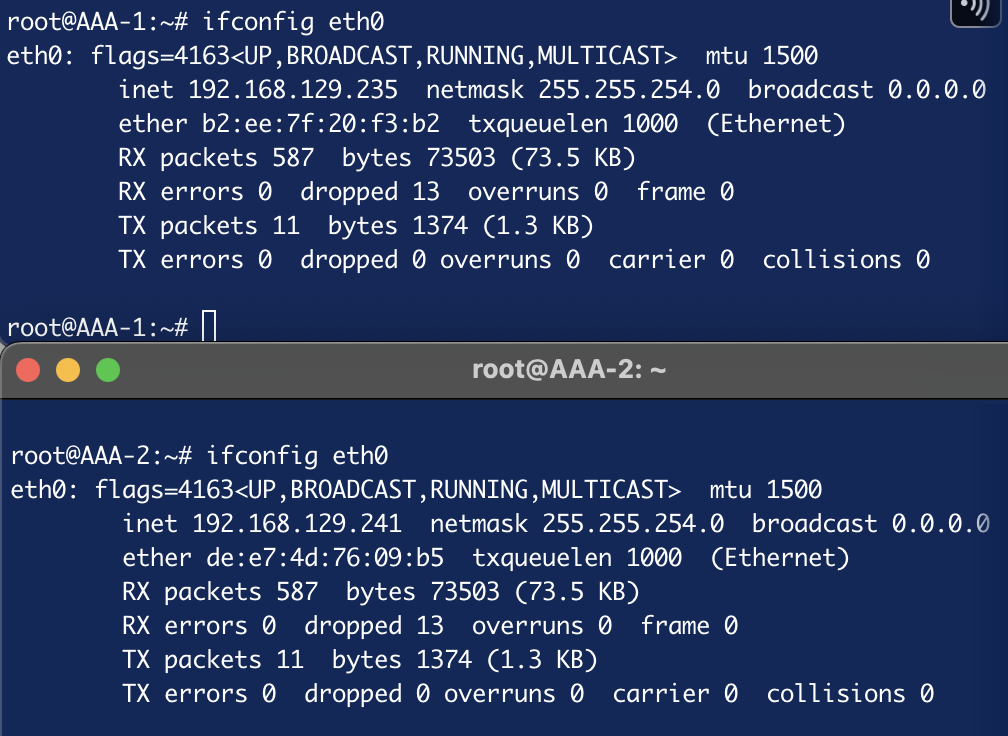
Using the console in GNS3 to check the IP addresses on the servers, we can see that the servers have valid IP addresses.
2. Configuring SSID with 802.1X authentication
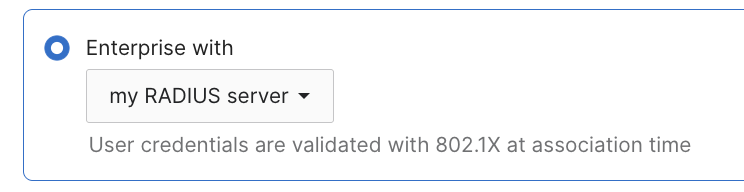
For this test, I use a Meraki MR56 and configure an SSID with WPA-Enterprise security on the dashboard.
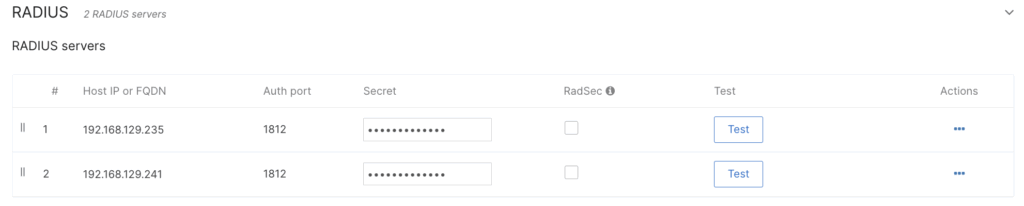
Next, add the IP addresses of the two servers from the previous DHCP result, using the default shared secret gns3.
Meraki provides a test tool on UI for further verification. Using one of the preset credentials, bob/gns3, the tool shows a successful test for the primary server at the top of the list.

The running GNS3 packet capture also shows bi-directional RADIUS packets between the AP and the server for this test, including the Access-Accept message.

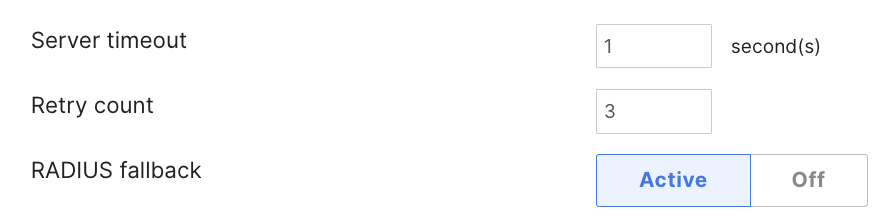
Additionally, I enabled the RADIUS fallback option for the subsequent test with an actual client.
Based on this KB, the AP switches back to the higher-priority server when a server becomes reachable again.
Where the available server with higher priority will be used (priority 1 is the highest). If Server 1 were to become unreachable, Server 2 would become active, and so on. If the fallback option is enabled, once the server with higher priority recovers, the AP will switch back to using that preferred (higher priority) server.
3. Connect wireless client and observe the AP’s behavior
My current configuration is as follows: 192.168.129.235 (AAA-1) is set as the highest priority and should be used first. If it becomes unreachable, the AP will fail over to the secondary server, 192.168.129.241 (AAA-2). Once the primary server comes back online, the AP switches back to it.
Using GNS3, this test is simple to perform, and every detail can be easily verified.
First, I connected my iPhone to the SSID to confirm a valid wireless device connection. As expected, the AP initially used the primary server, and the connection was successful.

To simulate a primary server failure, I disconnected it on GNS3 by removing the link.
Now, the AP uses the secondary server after the configured three retry attempts. We can also see that the AP sends requests every second, as previously configured in the UI.

The KB also explains the fallback mechanism as follows. Therefore, we should now see continuous Status-Server (12) messages being sent from the AP to check the availability of the primary server.
The fallback mechanism relies on the server’s implementation of the RFC-5997
By checking the Wireshark, I can see that AP is sending messages.
When I reconnect the link in GNS3, the primary server responds to the Status-Server (12) messages, so the AP now recognizes that the server is back online.

After this, the next 802.1X connection uses the primary server as expected.
Summary
This is one way to utilize GNS3 for wireless testing of 802.1X authentication, but it can also be applied to wired devices. GNS3 is not only useful for working with certificates, it is also a valuable tool for understanding expected behavior in depth and testing different conditions and configurations for actual work.
Thank you for reading through this post. I hope this helps.
Comments